Virtual Environments For Software Development
Overview
Teaching: 30 min
Exercises: 0 minQuestions
What are virtual environments in software development and why you should use them?
How can we manage Python virtual environments and external (third-party) libraries?
Objectives
Set up a Python virtual environment for our software project using
venvandpip.Run our software from the command line.
Introduction
So far we have cloned our software project from GitHub and inspected its contents and architecture a bit. We now want to run our code to see what it does - let’s do that from the command line. For the most part of the course we will run our code and interact with Git from the command line. While we will develop and debug our code using the PyCharm IDE and it is possible to use Git from PyCharm too, typing commands in the command line allows you to familiarise yourself and learn it well. A bonus is that this knowledge is transferable to running code in other programming languages and is independent from any IDE you may use in the future.
If you have a little peek into our code
(e.g. run cat inflammation/views.py from the project root),
you will see the following two lines somewhere at the top.
from matplotlib import pyplot as plt
import numpy as np
This means that our code requires two external libraries
(also called third-party packages or dependencies) -
numpy and matplotlib.
Python applications often use external libraries that don’t come as part of the standard Python distribution.
This means that you will have to use a package manager tool to install them on your system.
Applications will also sometimes need a
specific version of an external library
(e.g. because they were written to work with feature, class,
or function that may have been updated in more recent versions),
or a specific version of Python interpreter.
This means that each Python application you work with may require a different setup
and a set of dependencies so it is useful to be able to keep these configurations
separate to avoid confusion between projects.
The solution for this problem is to create a self-contained
virtual environment per project,
which contains a particular version of Python installation
plus a number of additional external libraries.
Virtual environments are not just a feature of Python - most modern programming languages use a similar mechanism to isolate libraries or dependencies for a specific project, making it easier to develop, run, test and share code with others. Some examples include Bundler for Ruby, Conan for C++, or Maven with classpath for Java. This can also be achieved with more generic package managers like Spack, which is used extensively in HPC settings to resolve complex dependencies. In this episode, we learn how to set up a virtual environment to develop our code and manage our external dependencies.
Virtual Environments
So what exactly are virtual environments, and why use them?
A Python virtual environment helps us create an isolated working copy of a software project that uses a specific version of Python interpreter together with specific versions of a number of external libraries installed into that virtual environment. Python virtual environments are implemented as directories with a particular structure within software projects, containing links to specified dependencies allowing isolation from other software projects on your machine that may require different versions of Python or external libraries.
As more external libraries are added to your Python project over time, you can add them to its specific virtual environment and avoid a great deal of confusion by having separate (smaller) virtual environments for each project rather than one huge global environment with potential package version clashes. Another big motivator for using virtual environments is that they make sharing your code with others much easier (as we will see shortly). Here are some typical scenarios where the use of virtual environments is highly recommended (almost unavoidable):
- You have an older project that only works under Python 2. You do not have the time to migrate the project to Python 3 or it may not even be possible as some of the third party dependencies are not available under Python 3. You have to start another project under Python 3. The best way to do this on a single machine is to set up two separate Python virtual environments.
- One of your Python 3 projects is locked to use a particular older version of a third party dependency. You cannot use the latest version of the dependency as it breaks things in your project. In a separate branch of your project, you want to try and fix problems introduced by the new version of the dependency without affecting the working version of your project. You need to set up a separate virtual environment for your branch to ‘isolate’ your code while testing the new feature.
You do not have to worry too much about specific versions of external libraries that your project depends on most of the time. Virtual environments also enable you to always use the latest available version without specifying it explicitly. They also enable you to use a specific older version of a package for your project, should you need to.
A Specific Python or Package Version is Only Ever Installed Once
Note that you will not have a separate Python or package installations for each of your projects - they will only ever be installed once on your system but will be referenced from different virtual environments.
Managing Python Virtual Environments
There are several commonly used command line tools for managing Python virtual environments:
venv, available by default from the standardPythondistribution fromPython 3.3+virtualenv, needs to be installed separately but supports bothPython 2.7+andPython 3.3+versionspipenv, created to fix certain shortcomings ofvirtualenvconda, package and environment management system (also included as part of the Anaconda Python distribution often used by the scientific community)poetry, a modern Python packaging tool which handles virtual environments automatically
While there are pros and cons for using each of the above,
all will do the job of managing Python virtual environments for you
and it may be a matter of personal preference which one you go for.
In this course, we will use venv to create and manage our virtual environment
(which is the preferred way for Python 3.3+).
The upside is that venv virtual environments created from the command line are
also recognised and picked up automatically by PyCharm IDE,
as we will see in the next episode.
Managing External Packages
Part of managing your (virtual) working environment involves
installing, updating and removing external packages on your system.
The Python package manager tool pip is most commonly used for this -
it interacts and obtains the packages from the central repository called
Python Package Index (PyPI).
pip can now be used with all Python distributions (including Anaconda).
A Note on Anaconda and
condaAnaconda is an open source Python distribution commonly used for scientific programming - it conveniently installs Python, package and environment management
conda, and a number of commonly used scientific computing packages so you do not have to obtain them separately.condais an independent command line tool (available separately from the Anaconda distribution too) with dual functionality: (1) it is a package manager that helps you find Python packages from remote package repositories and install them on your system, and (2) it is also a virtual environment manager. So, you can usecondafor both tasks instead of usingvenvandpip.
Many Tools for the Job
Installing and managing Python distributions,
external libraries and virtual environments is, well, complex.
There is an abundance of tools for each task,
each with its advantages and disadvantages,
and there are different ways to achieve the same effect
(and even different ways to install the same tool!).
Note that each Python distribution comes with its own version of pip -
and if you have several Python versions installed you have to be extra careful to
use the correct pip to manage external packages for that Python version.
venv and pip are considered the de facto standards for virtual environment
and package management for Python 3.
However, the advantages of using Anaconda and conda are that
you get (most of the) packages needed for scientific code development included with the distribution.
If you are only collaborating with others who are also using Anaconda,
you may find that conda satisfies all your needs.
It is good, however, to be aware of all these tools, and use them accordingly.
As you become more familiar with them you will realise that
equivalent tools work in a similar way even though the command syntax may be different
(and that there are equivalent tools for other programming languages too
to which your knowledge can be ported).
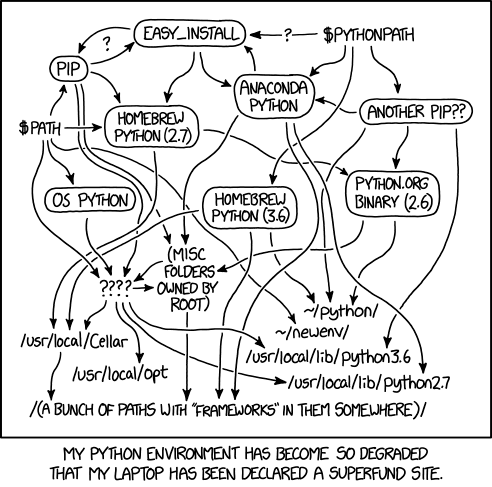
Python Environment Hell
From XKCD (Creative Commons Attribution-NonCommercial 2.5 License)
Let us have a look at how we can create and manage virtual environments from the command line
using venv and manage packages using pip.
Making Sure You Can Invoke Python
You can test your Python installation from the command line with:
$ python3 --version # on Mac/Linux
$ python --version # on Windows — Windows installation comes with a python.exe file rather than a python3.exe file
If you are using Windows and invoking
pythoncommand causes your Git Bash terminal to hang with no error message or output, you may need to create an alias for the python executablepython.exe, as explained in the troubleshooting section.
Creating Virtual Environments Using venv
Creating a virtual environment with venv is done by executing the following command:
$ python3 -m venv /path/to/new/virtual/environment
where /path/to/new/virtual/environment is a path to a directory where you want to place it -
conventionally within your software project so they are co-located.
This will create the target directory for the virtual environment
(and any parent directories that don’t exist already).
What is
-mFlag inpython3Command?The Python
-mflag means “module” and tells the Python interpreter to treat what follows-mas the name of a module and not as a single, executable program with the same name. Some modules (such asvenvorpip) have main entry points and the-mflag can be used to invoke them on the command line via thepythoncommand. The main difference between running such modules as standalone programs (e.g. executing “venv” by running thevenvcommand directly) versus usingpython3 -mcommand seems to be that with latter you are in full control of which Python module will be invoked (the one that came with your environment’s Python interpreter vs. some other version you may have on your system). This makes it a more reliable way to set things up correctly and avoid issues that could prove difficult to trace and debug.
For our project let’s create a virtual environment called “venv”. First, ensure you are within the project root directory, then:
$ python3 -m venv venv
If you list the contents of the newly created directory “venv”, on a Mac or Linux system (slightly different on Windows as explained below) you should see something like:
$ ls -l venv
total 8
drwxr-xr-x  12 alex  staff  384  5 Oct 11:47 bin
drwxr-xr-x   2 alex  staff   64  5 Oct 11:47 include
drwxr-xr-x   3 alex  staff   96  5 Oct 11:47 lib
-rw-r--r--   1 alex  staff   90  5 Oct 11:47 pyvenv.cfg
So, running the python3 -m venv venv command created the target directory called “venv”
containing:
pyvenv.cfgconfiguration file with a home key pointing to the Python installation from which the command was run,binsubdirectory (calledScriptson Windows) containing a symlink of the Python interpreter binary used to create the environment and the standard Python library,lib/pythonX.Y/site-packagessubdirectory (calledLib\site-packageson Windows) to contain its own independent set of installed Python packages isolated from other projects, and- various other configuration and supporting files and subdirectories.
Naming Virtual Environments
What is a good name to use for a virtual environment? Using “venv” or “.venv” as the name for an environment and storing it within the project’s directory seems to be the recommended way - this way when you come across such a subdirectory within a software project, by convention you know it contains its virtual environment details. A slight downside is that all different virtual environments on your machine then use the same name and the current one is determined by the context of the path you are currently located in. A (non-conventional) alternative is to use your project name for the name of the virtual environment, with the downside that there is nothing to indicate that such a directory contains a virtual environment. In our case, we have settled to use the name “venv” instead of “.venv” since it is not a hidden directory and we want it to be displayed by the command line when listing directory contents (the “.” in its name that would, by convention, make it hidden). In the future, you will decide what naming convention works best for you. Here are some references for each of the naming conventions:
- The Hitchhiker’s Guide to Python notes that “venv” is the general convention used globally
- The Python Documentation indicates that “.venv” is common
- “venv” vs “.venv” discussion
Once you’ve created a virtual environment, you will need to activate it.
On Mac or Linux, it is done as:
$ source venv/bin/activate
(venv) $
On Windows, recall that we have Scripts directory instead of bin
and activating a virtual environment is done as:
$ source venv/Scripts/activate
(venv) $
Activating the virtual environment will change your command line’s prompt to show what virtual environment you are currently using (indicated by its name in round brackets at the start of the prompt), and modify the environment so that running Python will get you the particular version of Python configured in your virtual environment.
You can verify you are using your virtual environment’s version of Python
by checking the path using the command which:
(venv) $ which python3
/home/alex/python-intermediate-inflammation/venv/bin/python3
When you’re done working on your project, you can exit the environment with:
(venv) $ deactivate
If you’ve just done the deactivate,
ensure you reactivate the environment ready for the next part:
$ source venv/bin/activate
(venv) $
Python Within A Virtual Environment
Within an active virtual environment, commands
python3andpythonshould both refer to the version of Python 3 you created the environment with (note you may have multiple Python 3 versions installed).However, on some machines with Python 2 installed,
pythoncommand may still be hardwired to the copy of Python 2 installed outside of the virtual environment - this can cause errors and confusion.You can always check which version of Python you are using in your virtual environment with the command
which pythonto be absolutely sure. We continue usingpython3in this material to avoid mistakes, but the commandpythonmay work for you as expected.
Note that, since our software project is being tracked by Git, the newly created virtual environment will show up in version control - we will see how to handle it using Git in one of the subsequent episodes.
Installing External Packages Using pip
We noticed earlier that our code depends on two external packages/libraries -
numpy and matplotlib.
In order for the code to run on your machine,
you need to install these two dependencies into your virtual environment.
To install the latest version of a package with pip
you use pip’s install command and specify the package’s name, e.g.:
(venv) $ python3 -m pip install numpy
(venv) $ python3 -m pip install matplotlib
or like this to install multiple packages at once for short:
(venv) $ python3 -m pip install numpy matplotlib
How About
pip3 install <package-name>Command?You may have seen or used the
pip3 install <package-name>command in the past, which is shorter and perhaps more intuitive thanpython3 -m pip install. However, the official Pip documentation recommendspython3 -m pip installand core Python developer Brett Cannon offers a more detailed explanation of edge cases when the two commands may produce different results and whypython3 -m pip installis recommended. In this material, we will usepython3 -mwhenever we have to invoke a Python module from command line.
If you run the python3 -m pip install command on a package that is already installed,
pip will notice this and do nothing.
To install a specific version of a Python package
give the package name followed by == and the version number,
e.g. python3 -m pip install numpy==1.21.1.
To specify a minimum version of a Python package,
you can do python3 -m pip install numpy>=1.20.
To upgrade a package to the latest version, e.g. python3 -m pip install --upgrade numpy.
To display information about a particular installed package do:
(venv) $ python3 -m pip show numpy
Name: numpy
Version: 1.26.2
Summary: Fundamental package for array computing in Python
Home-page: https://numpy.org
Author: Travis E. Oliphant et al.
Author-email:
License: Copyright (c) 2005-2023, NumPy Developers.
All rights reserved.
...
Required-by: contourpy, matplotlib
To list all packages installed with pip (in your current virtual environment):
(venv) $ python3 -m pip list
Package         Version
--------------- -------
contourpy       1.2.0
cycler          0.12.1
fonttools       4.45.0
kiwisolver      1.4.5
matplotlib      3.8.2
numpy           1.26.2
packaging       23.2
Pillow          10.1.0
pip             23.0.1
pyparsing       3.1.1
python-dateutil 2.8.2
setuptools      67.6.1
six             1.16.0
To uninstall a package installed in the virtual environment do: python3 -m pip uninstall <package-name>.
You can also supply a list of packages to uninstall at the same time.
Exporting/Importing Virtual Environments Using pip
You are collaborating on a project with a team so, naturally,
you will want to share your environment with your collaborators
so they can easily ‘clone’ your software project with all of its dependencies
and everyone can replicate equivalent virtual environments on their machines.
pip has a handy way of exporting, saving and sharing virtual environments.
To export your active environment -
use python3 -m pip freeze command to produce a list of packages installed in the virtual environment.
A common convention is to put this list in a requirements.txt file:
(venv) $ python3 -m pip freeze > requirements.txt
(venv) $ cat requirements.txt
contourpy==1.2.0
cycler==0.12.1
fonttools==4.45.0
kiwisolver==1.4.5
matplotlib==3.8.2
numpy==1.26.2
packaging==23.2
Pillow==10.1.0
pyparsing==3.1.1
python-dateutil==2.8.2
six==1.16.0
The first of the above commands will create a requirements.txt file in your current directory.
Yours may look a little different,
depending on the version of the packages you have installed,
as well as any differences in the packages that they themselves use.
The requirements.txt file can then be committed to a version control system
(we will see how to do this using Git in one of the following episodes)
and get shipped as part of your software and shared with collaborators and/or users.
They can then replicate your environment
and install all the necessary packages from the project root as follows:
(venv) $ python3 -m pip install -r requirements.txt
As your project grows - you may need to update your environment for a variety of reasons.
For example, one of your project’s dependencies has just released a new version
(dependency version number update),
you need an additional package for data analysis (adding a new dependency)
or you have found a better package and no longer need the older package
(adding a new and removing an old dependency).
What you need to do in this case
(apart from installing the new and removing the packages that are no longer needed
from your virtual environment)
is update the contents of the requirements.txt file accordingly
by re-issuing pip freeze command
and propagate the updated requirements.txt file to your collaborators
via your code sharing platform (e.g. GitHub).
Official Documentation
For a full list of options and commands, consult the official
venvdocumentation and the Installing Python Modules withpipguide. Also check out the guide “Installing packages usingpipand virtual environments”.
Running Python Scripts From Command Line
Congratulations!
Your environment is now activated and set up
to run our inflammation-analysis.py script from the command line.
You should already be located in the root of the python-intermediate-inflammation directory
(if not, please navigate to it from the command line now).
To run the script, type the following command:
(venv) $ python3 inflammation-analysis.py
usage: inflammation-analysis.py [-h] infiles [infiles ...]
inflammation-analysis.py: error: the following arguments are required: infiles
In the above command, we tell the command line two things:
- to find a Python interpreter (in this case, the one that was configured via the virtual environment), and
- to use it to run our script
inflammation-analysis.py, which resides in the current directory.
As we can see, the Python interpreter ran our script, which threw an error -
inflammation-analysis.py: error: the following arguments are required: infiles.
It looks like the script expects a list of input files to process,
so this is expected behaviour since we don’t supply any.
We will fix this error in a moment.
Key Points
Virtual environments keep Python versions and dependencies required by different projects separate.
A virtual environment is itself a directory structure.
Use
venvto create and manage Python virtual environments.Use
pipto install and manage Python external (third-party) libraries.
pipallows you to declare all dependencies for a project in a separate file (by convention calledrequirements.txt) which can be shared with collaborators/users and used to replicate a virtual environment.Use
python3 -m pip freeze > requirements.txtto take snapshot of your project’s dependencies.Use
python3 -m pip install -r requirements.txtto replicate someone else’s virtual environment on your machine from therequirements.txtfile.